Prerequisites
- Claude Code CLI, Desktop app, or VS Code extension (latest version)
- An AutoXPP API key for premium skills — get one at xplusplus.ai/autoxpp
Open the Plugin Manager
Type /plugin in Claude Code, then navigate to the Marketplaces tab. Click + Add Marketplace.
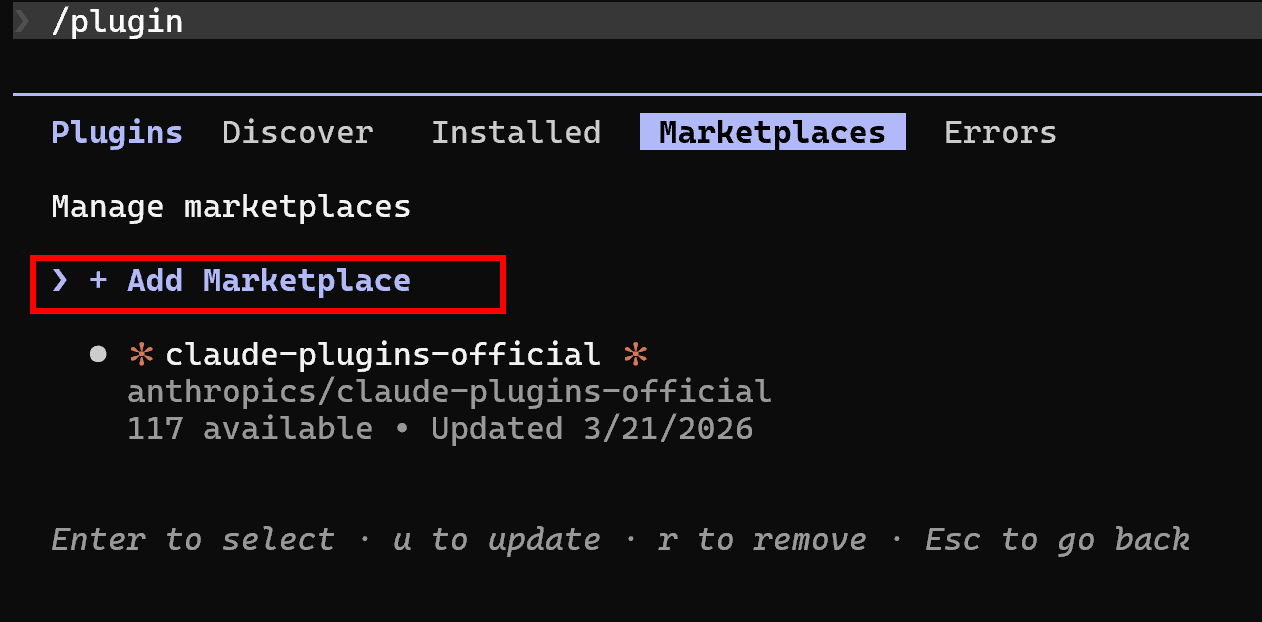
The Marketplaces tab in the plugin manager
Add the AutoXPP Marketplace
In the "Add Marketplace" dialog, enter the marketplace identifier and press Enter:
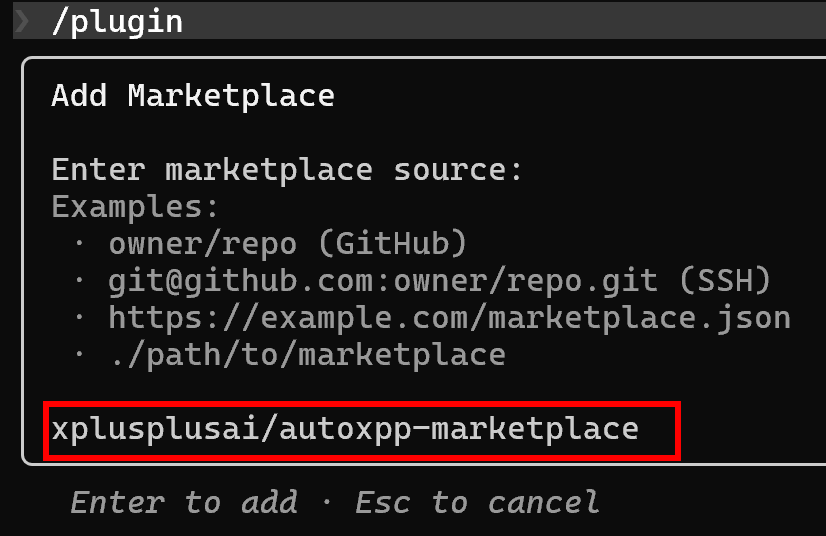
Entering the AutoXPP marketplace identifier
Find the AutoXPP Plugin
Switch to the Discover tab. You should see autoxpp in the list. Select it to view details.

The autoxpp plugin appears in the Discover tab
Install the Plugin
On the Plugin Details screen, choose your install scope:
- Install for you (user scope) Available in all your projects. Recommended for most users.
- Install for all collaborators (project scope) Adds to the repo's config, shared with your team.
- Install for you, in this repo only (local scope) Just this one project.
Select your preferred scope and press Enter. After installation, restart your Claude Code session for the plugin to take effect.
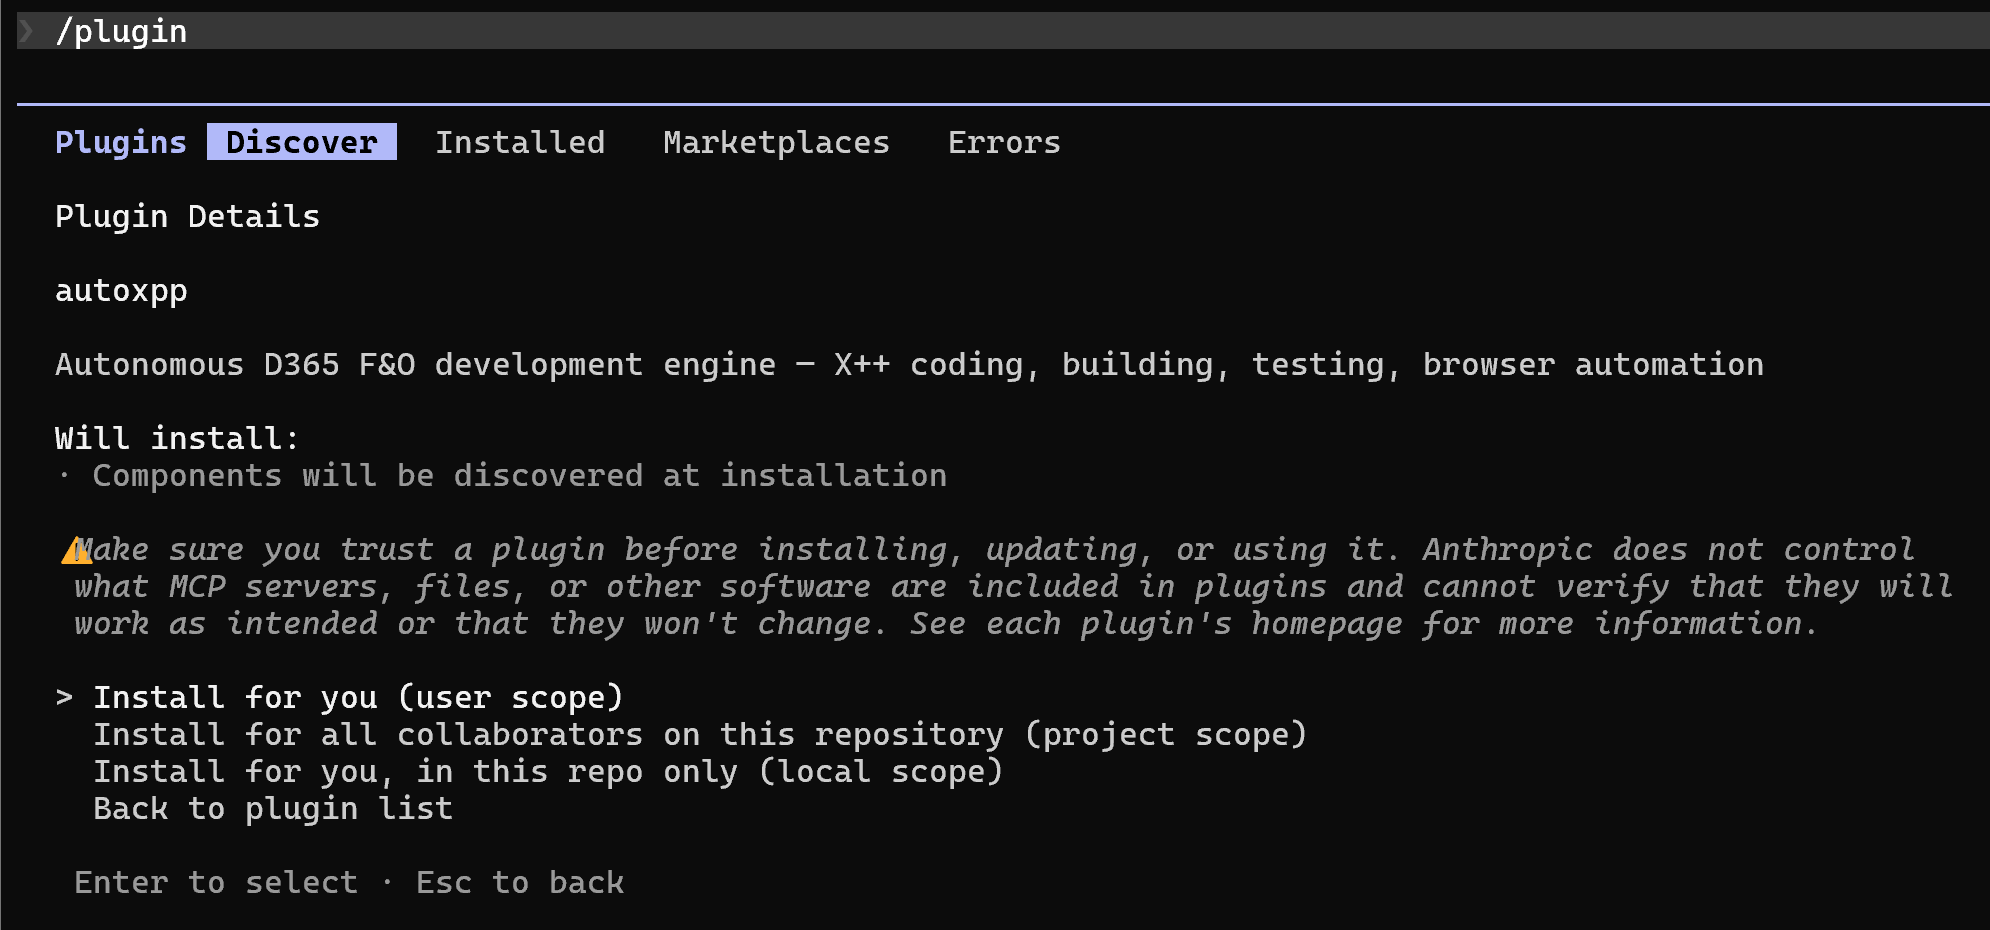
Choose your install scope
Configure Your API Key
After installation, run the setup skill to connect your API key:
Follow the prompts to enter your ak_... key. If you don't have one yet, visit xplusplus.ai/autoxpp to subscribe.
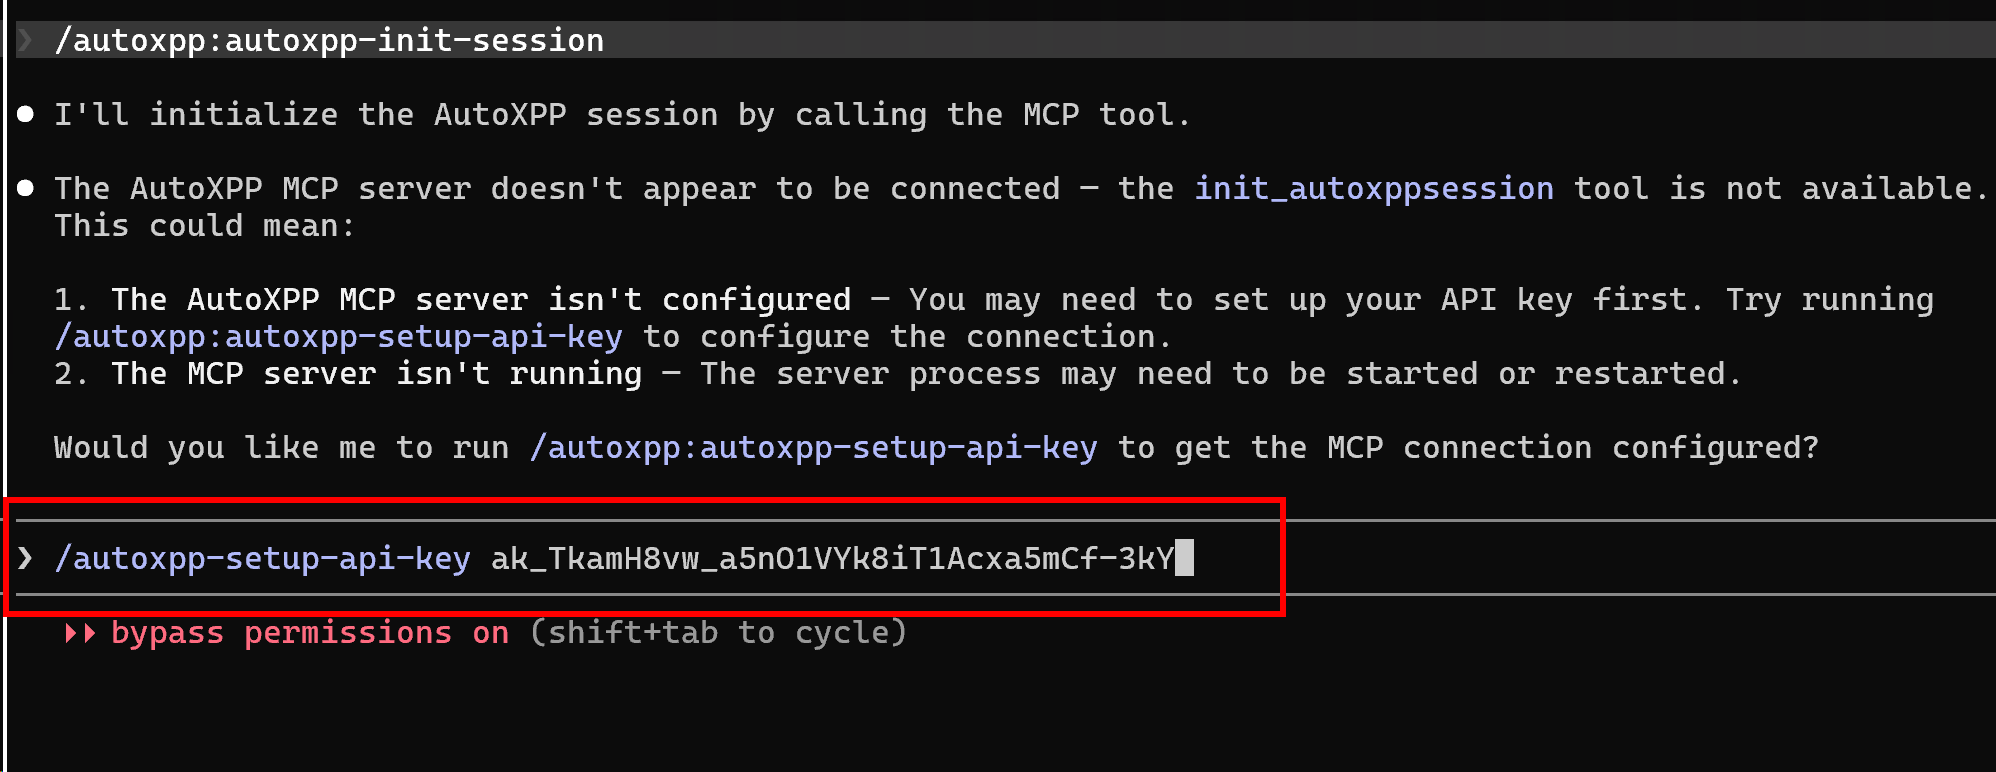
Setting up your API key
Verify Installation
Open /plugin again and check the Installed tab. You should see:
You're ready to go. Try /autoxpp-init-session to start a session, then use any AutoXPP skill.
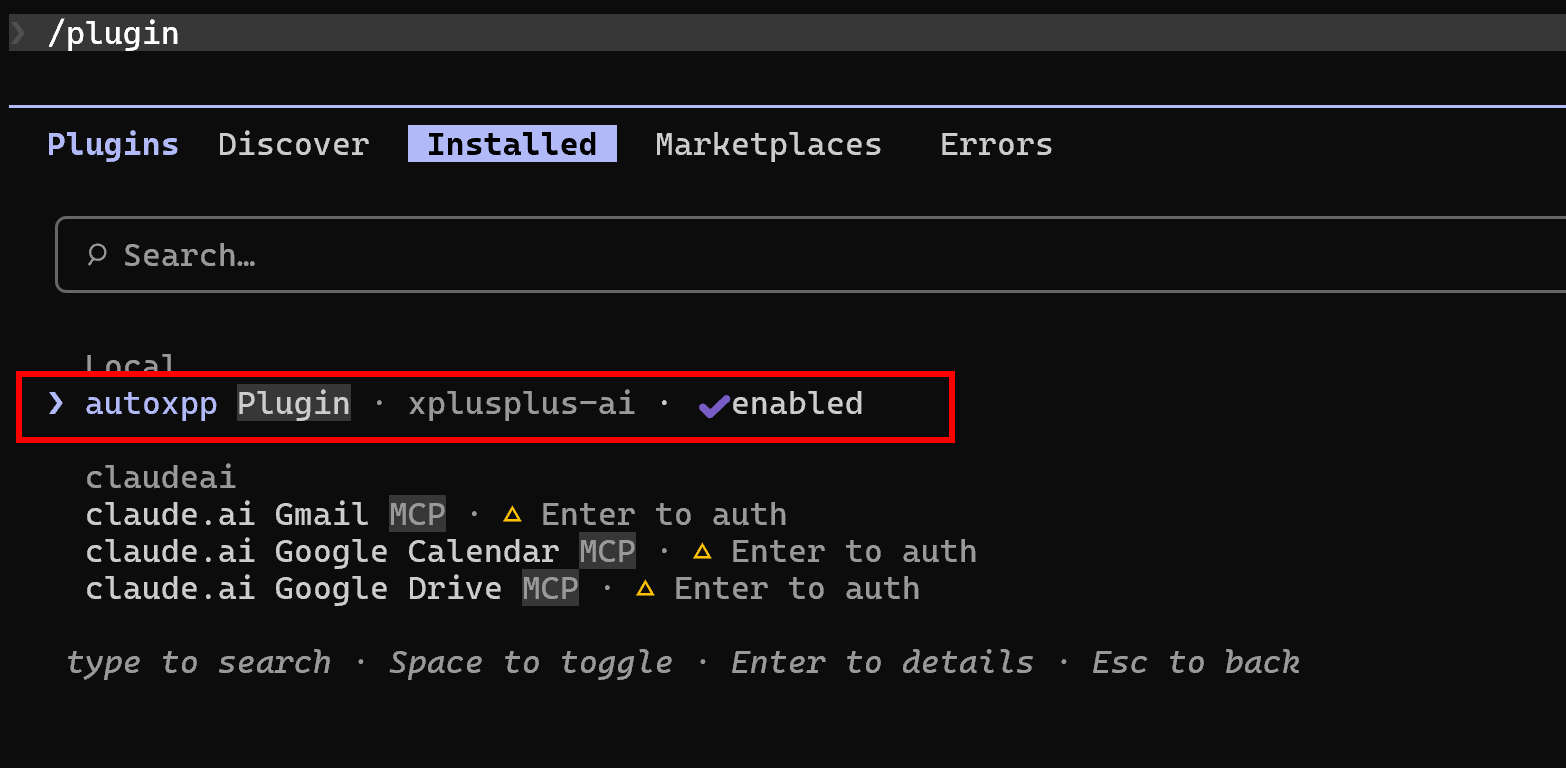
AutoXPP is installed and enabled
Maintenance
How to Update AutoXPP
When a new version is released, update in 3 steps.
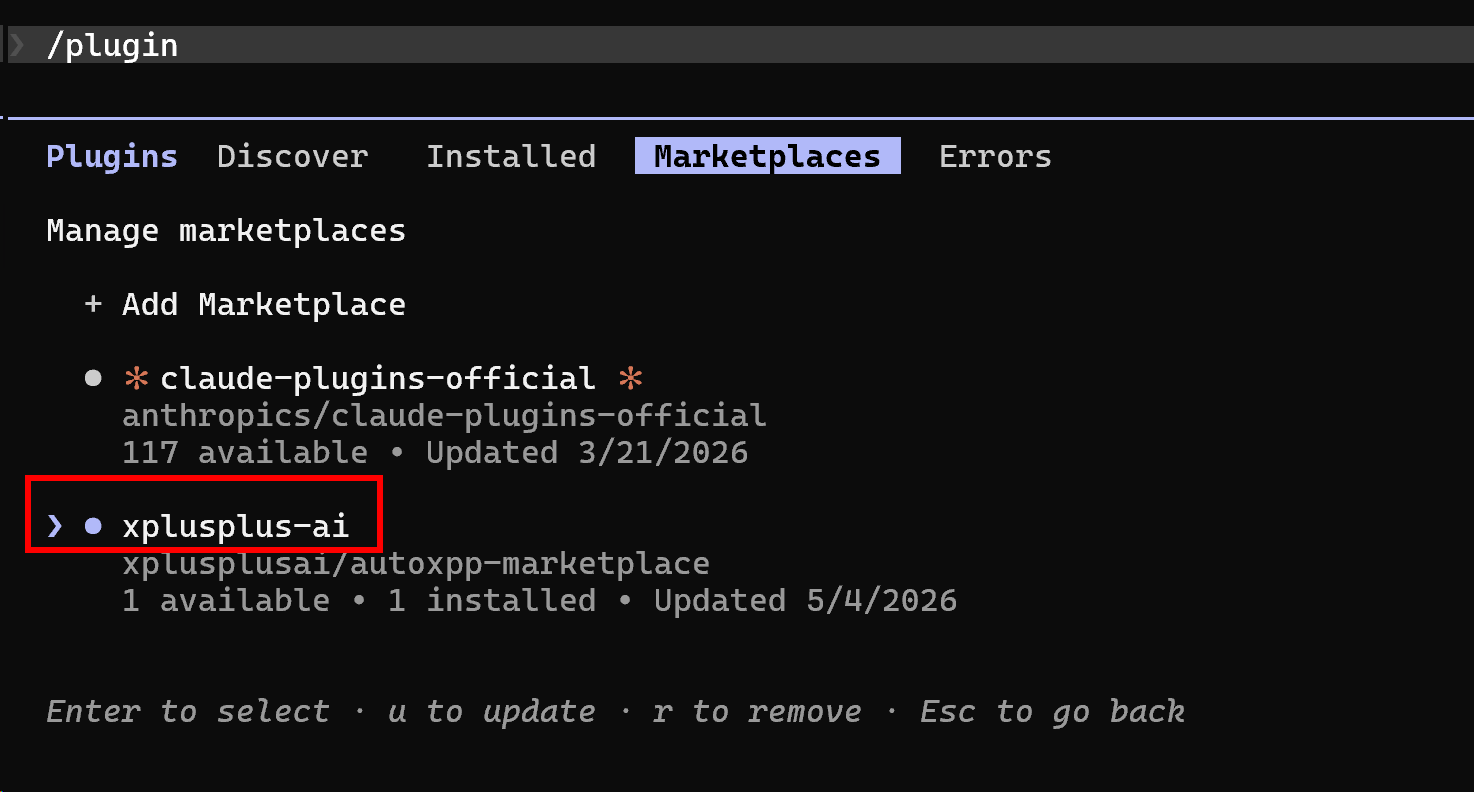
Update the Marketplace
Type /plugin and go to the Marketplaces tab. Select xplusplus-ai to open the marketplace details.
Select the xplusplus-ai marketplace
Click Update marketplace to fetch the latest plugin versions.
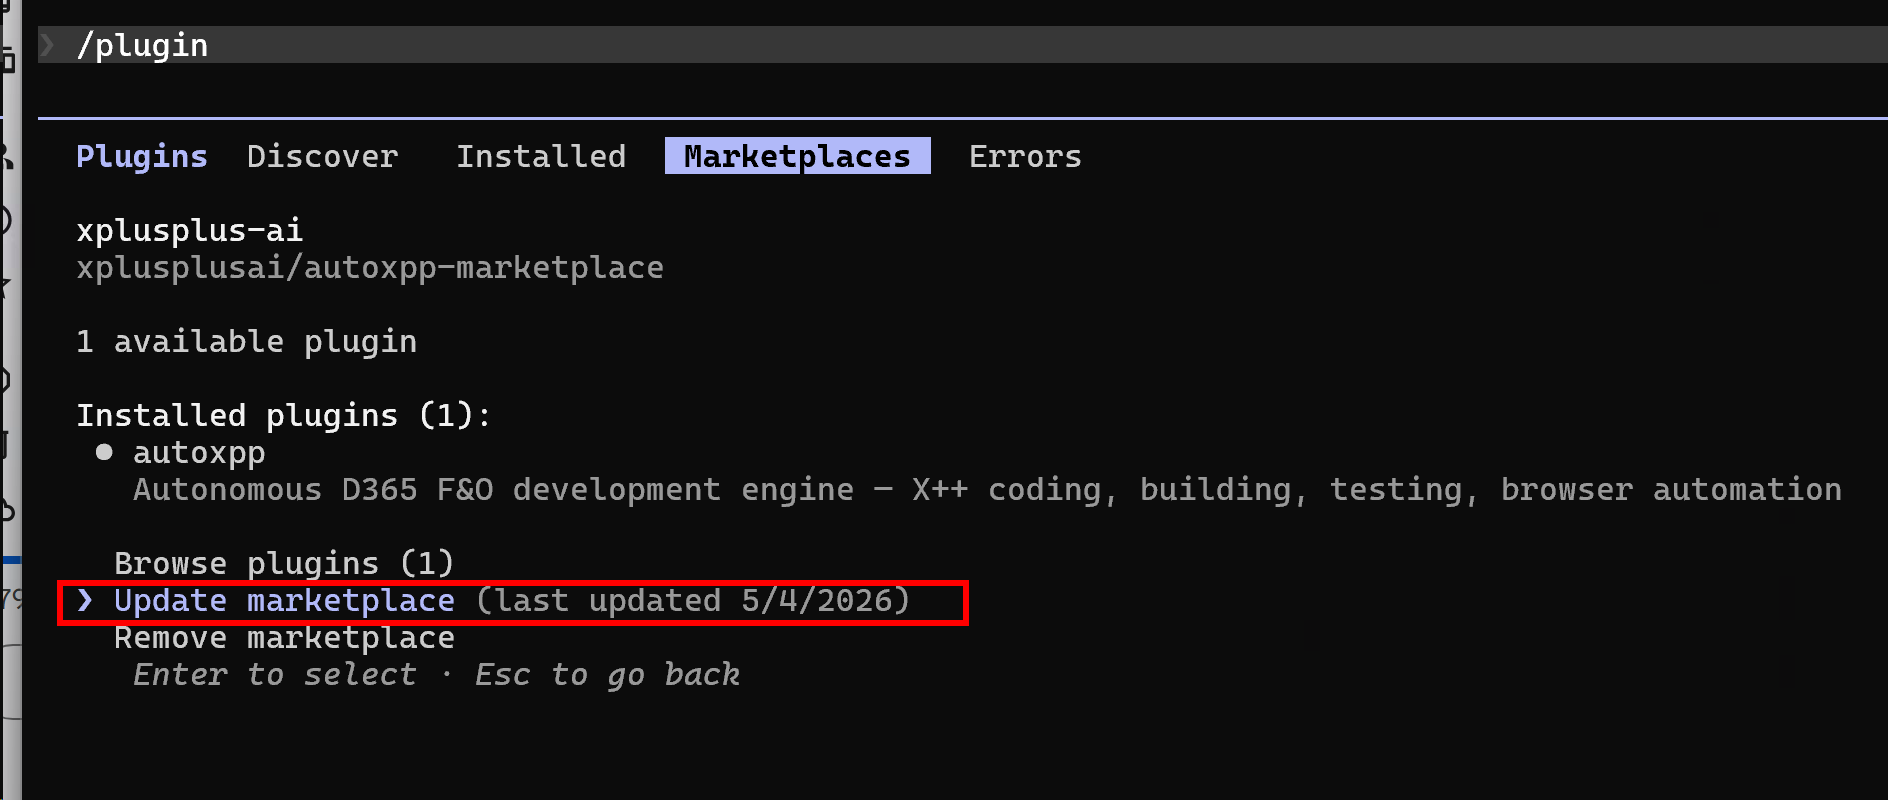
Click Update marketplace to sync
Update the Plugin
Go to the Installed tab, select autoxpp, and click Update now.
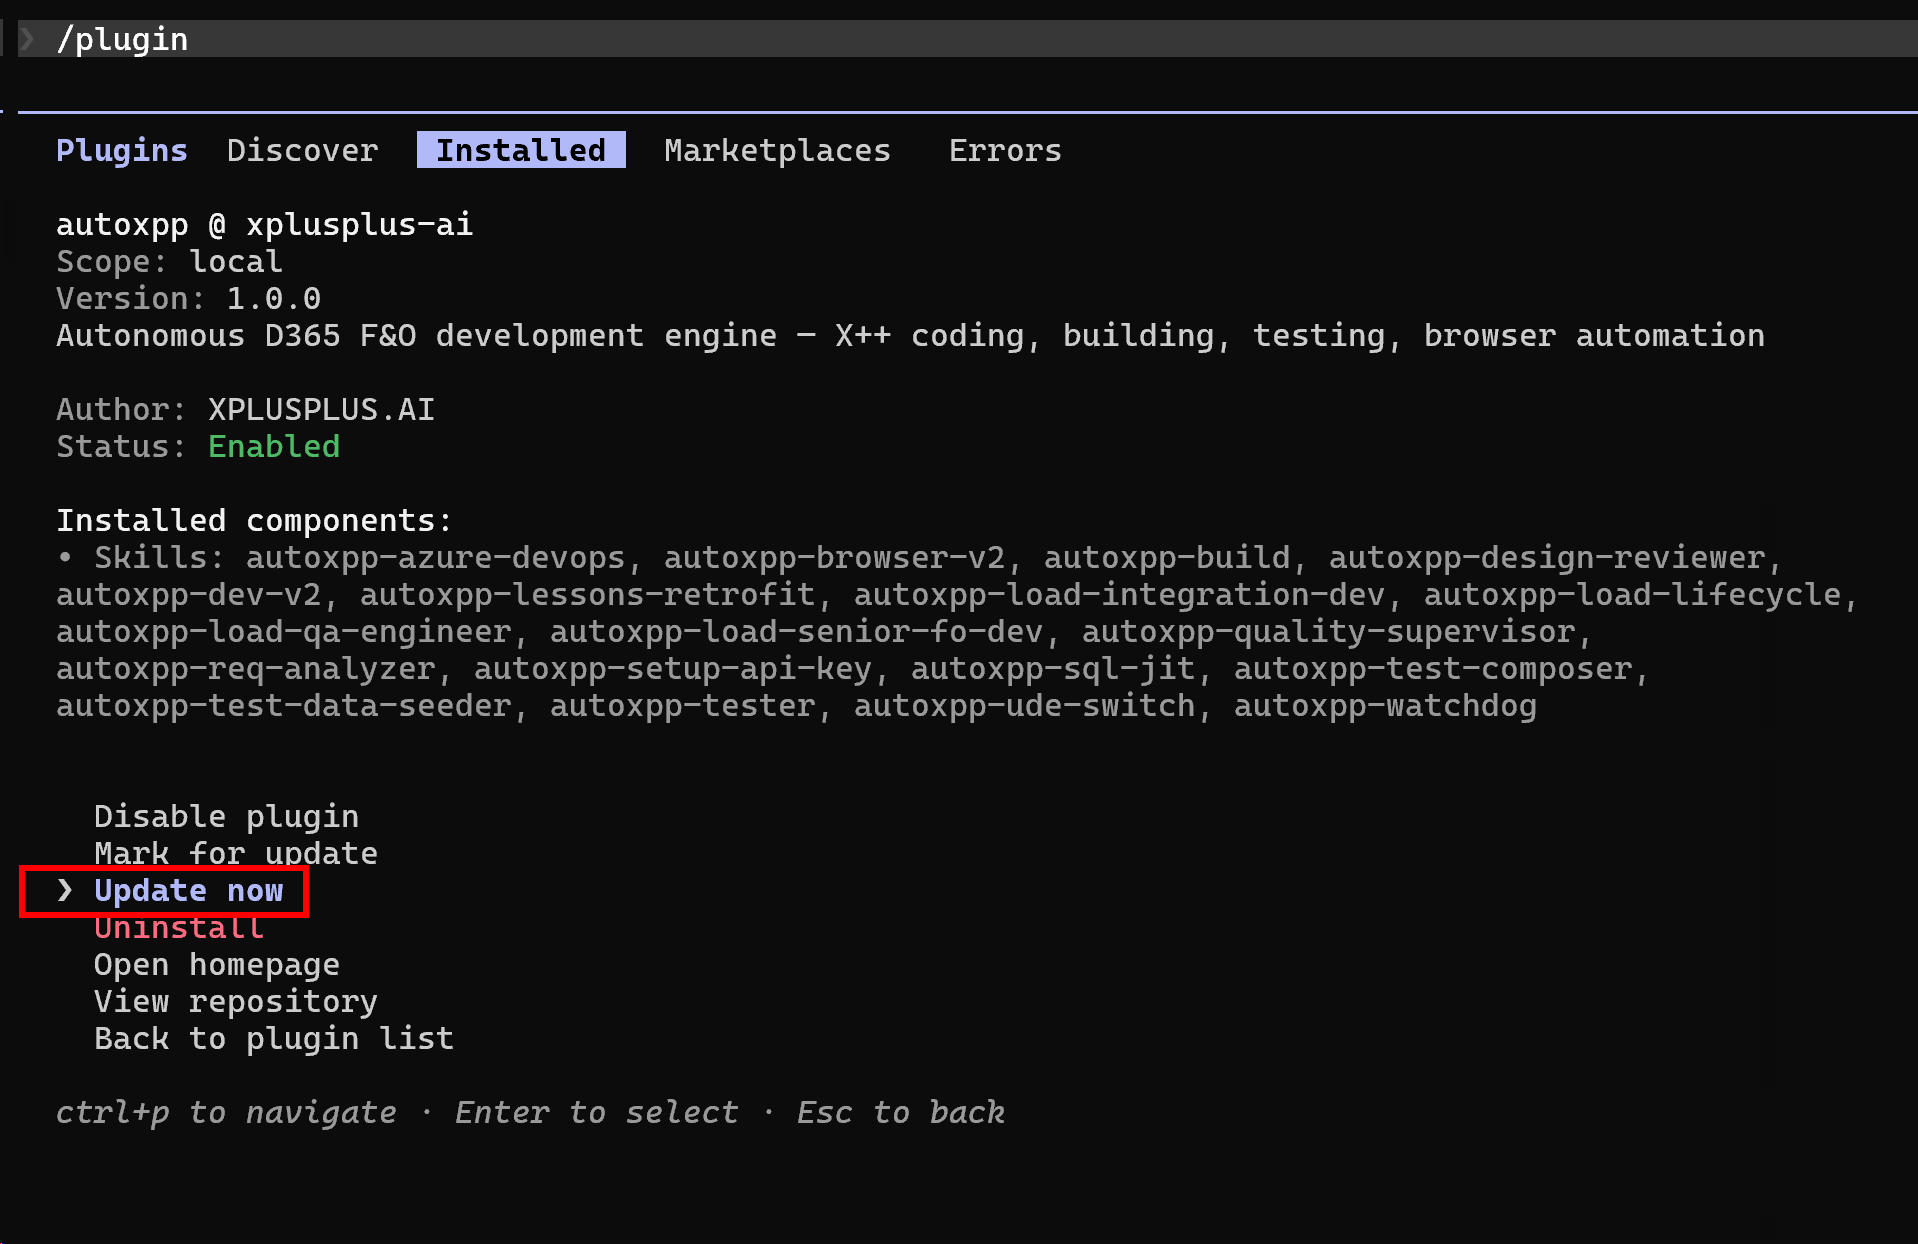
Click Update now to install the latest version
Restart Claude Code
Restart your Claude Code session for the updated plugin to take effect.
Support
Troubleshooting
| Problem | Fix |
|---|---|
| Plugin not appearing in Discover | Make sure the marketplace was added successfully in Step 2. Try /plugin > Marketplaces > check that xplusplusai/autoxpp-marketplace is listed. |
| MCP connection error after key setup | Restart Claude Code so the MCP server connects, then run /autoxpp-setup-api-key again to validate. |
| Skills show "locked" or "requires upgrade" | Your API key may be for the free tier. Visit xplusplus.ai/autoxpp to upgrade. |
| Free skills not working | Free skills (browser-v2, azure-devops, sql-jit, ude-switch) don't need an API key. Make sure the plugin itself is installed and enabled. |
Get Started
Ready to Build?
Free skills work without an API key. Premium skills require an active AutoXPP Pro subscription.